
If you want to raise birds for meat, backyard chicken processing is a great skill to have. You can save yourself the hassle and cost of sending your chickens to a meat processing facility by doing this farm chore yourself.
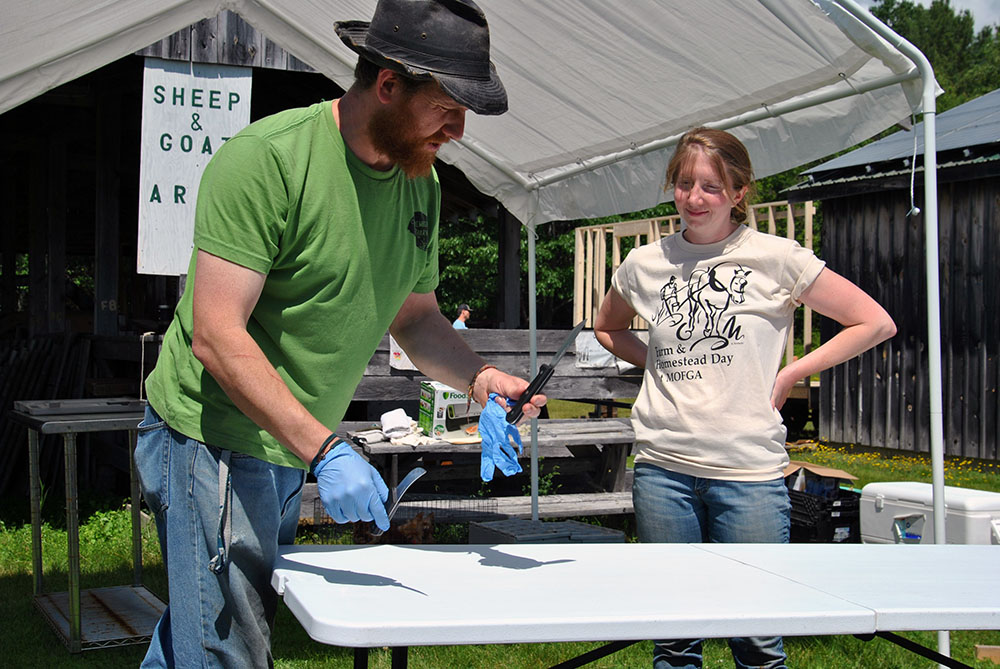
Myke Russel and Kathryn Cody, owners of November’s Harvest Farm in Limington, Maine, conducted a chicken processing workshop at the Maine Organic Farmers and Gardeners Association’s eighth annual Farm and Homestead Day in Unity, Maine.
Though Russel and Cody have extensive experience butchering chickens, they emphasized that there are many different techniques to butchering birds that may differ slightly from their own.
“This is not the definitive lecture,” Russel said. “Three farmers in Maine would have three different ways of doing it.”
Still, Russel explained, the fundamental tenets of backyard chicken processing are the same no matter your personal processing preferences. Here are the 10 basic steps of backyard chicken processing (warning: graphic images ahead).
Step 1: Choose your chickens
The most commonly processed chickens are young roosters, old hens or young meat birds of either sex.
In small backyard flocks especially, you do not want to have more than one or two mature roosters to avoid bloody competition. As soon as they mature, roosters of any breed are usually processed for meat.
The age you butcher a chicken depends on the breed. Russel said Cornish Cross Broiler chickens will be ready to process at 8 weeks.
“After 12 weeks, they are the size of a small turkey and their meat is very tough,” Russel said.
Heritage breeds and dual-purpose breeds, Russel said, can take longer to mature, usually between 10 and 12 weeks.
Hens that are no longer producing eggs can also be processed for meat.
“After three or four years, laying hens reach a point where you are feeding the birds and they’re not paying rent,” Russel said.
Russel warned that the meat is tougher on older birds, so be prepared to tenderize, slow roast or cook them into a soup.
Step 2: Clean your space and gather your equipment
Before you begin, gather and clean all the necessary tools and surfaces.
“We use tables to pluck and cut our chickens, so you want a nice clean space,” Russel said. He recommended using a diluted bleach solution to make sure the surfaces are germ-free.
Russel suggested having two sharp knives: one for separating joints and one for removing guts. In terms of the specific kind of knife, Russel’s personal philosophy is that “a knife is a knife is a knife,” but the blades should be between 4 and 6 inches long with freshly sharpened blades.
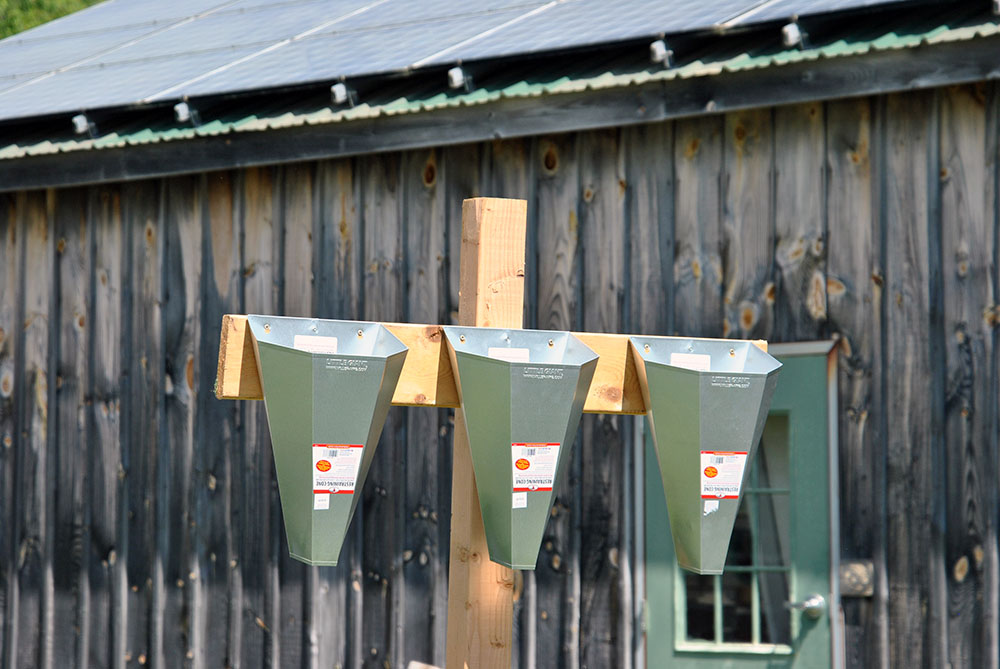
Russel also recommended using an apparatus equipped with killing cones, which will help restrain your chickens and prevent bruising while you are severing their jugular vein and carotid artery.
“I built this in 20 minutes with scrap timber,” Russel said of his three-cone cross.
You will also need a scalding tank, a large stockpot filled with water that is attached to a heat source, and a thermometer to read the water temperature.
Russel also said to keep an extra bucket handy to collect chicken feathers and innards for your compost pile.
Step 3: Kill your chicken

If you are just getting started with backyard chicken processing, Russel recommended processing one chicken at a time.
“Learn your speed,” Russel said. Otherwise, you may be overwhelmed and leave birds to spoil in the heat of the day.
There are several different killing techniques, but Russel recommends using a killing cone and a single slit through the main blood vessels in the neck for the quickest, most humane kill that best preserves the quality of the meat.
Hold the chicken upside so the blood rushes to its head, which calms the bird. Pull the chicken’s head through the bottom of the killing cone and hold it taut.
Using your sharpest knife, slice deeply across both sides of the neck to sever the jugular vein and carotid artery. Sometimes, Russel warned, it can be difficult to cut the knife through the feathers.
After you successfully slit the neck, pull the head down firmly and allow the blood to drain. Though the bird is unconscious, it will kick and jerk, but the restraining cone will prevent bruising. You can continue processing once the bird is completely still.
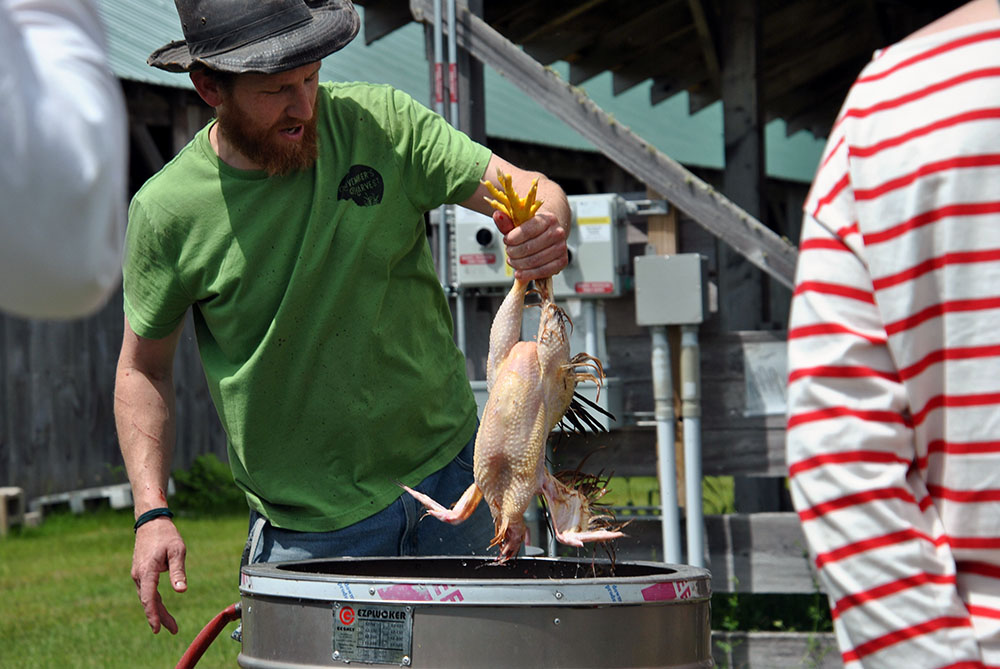
Step 4: Scald your chicken
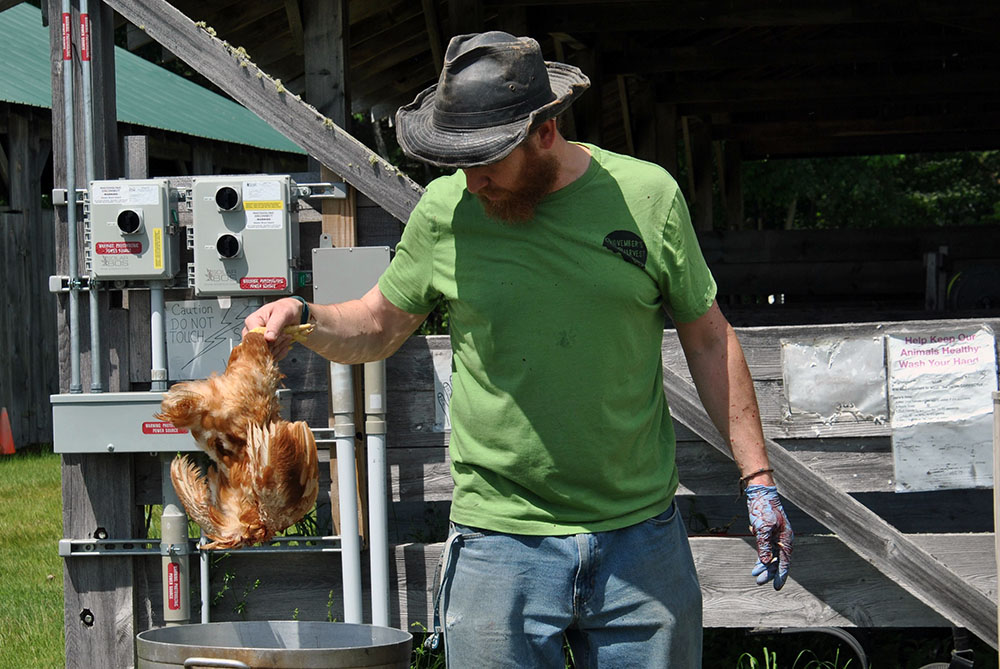
Once the chicken is deceased, scalding your chicken in hot water will help you remove the feathers more easily.
Heat your water to between 135 and 140 degrees Fahrenheit. Any hotter may damage the skin or begin cooking the bird.
Remove the bird from the killing cone and hold it by the feet. Dunk the bird headfirst into the scalding tank. Gently swirl the bird in the water — around, up and down to reach every nook and cranny — for about ten minutes. If large feathers on the wing or tail do not come out easily when you pluck them, scald the bird for a little longer.
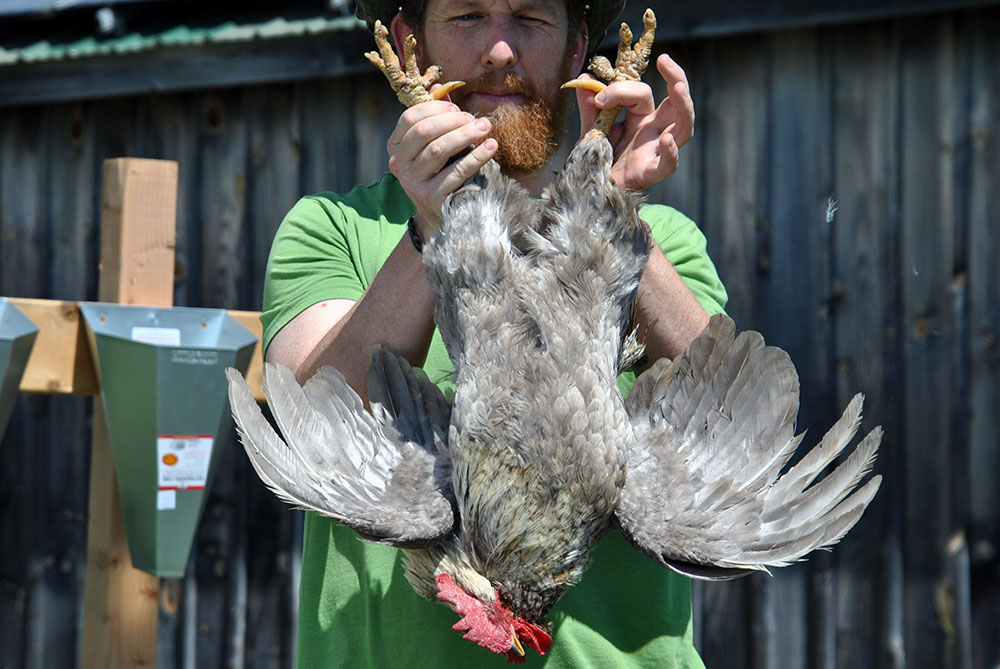
Step 5: Remove the chicken’s heads
Pull the head upwards, stretch the chicken’s neck and, using one of your sharp knives, cut through the esophagus and trachea just below the head. Some backyard chicken processors prefer to remove the head before they remove the gizzards, but others would rather remove the head before plucking to avoid the dead stare of freshly killed chicken.
![]()
Kathryn Cody, co-owner of November’s Harvest Farm in Limington, plucking a chicken. | Photo by Sam Schipani 
Kathryn Cody, co-owner of November’s Harvest Farm in Limington, plucking a chicken.| Photo by Sam Schipani ![]()
Myke Russel, co-owner of November’s Harvest Farm in Limington, using a chicken plucker. | Photo by Sam Schipani
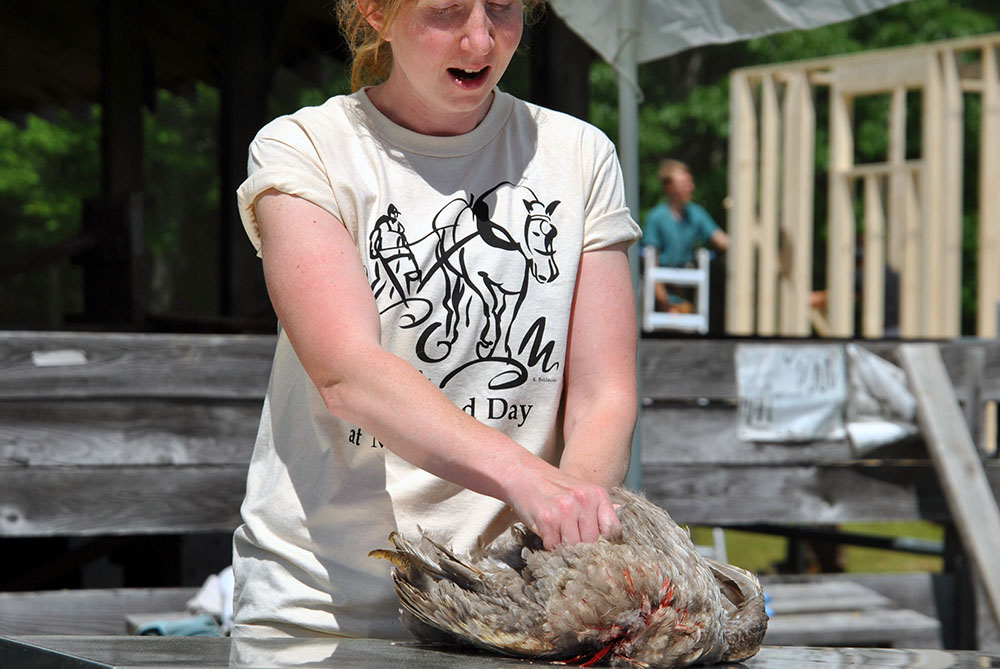
Step 6: Pluck your chicken
When plucking the feathers, pull against the grain to remove them. Grasp small handfuls to avoid tearing the chicken’s skin. For larger feathers, such as the ones on the wings and tail, pluck one at a time.
Many of the tiny, difficult to remove “pin” feathers will come off with the scalding water, but some will need to be plucked as well. You can do this by hand, or some poultry processing supply stores sell “pinning knives” that you can be scrape along the skin to remove the remaining pin feathers.
Russel also suggested using a plucker machine to quickly pluck birds.
“It takes about 30 seconds,” Russel said. “You don’t want to rupture the organs.”
The rub? The apparatus costs between $350 to $2,500.
“If you’re just doing backyard birds, it’s probably more of an investment than you need, but you can rent plucker machines at [some farm supply stores],” Russel said.
After plucking, rinse the bird to remove any loose feathers.
Myke Russel, co-owner of November’s Harvest Farm in Limington, removing the oil gland from a chicken. | Photo by Sam Schipani ![]()
Myke Russel, co-owner of November’s Harvest Farm in Limington, preparing to insert his knife into the body cavity of a freshly-plucked chicken. | Photo by Sam Schipani 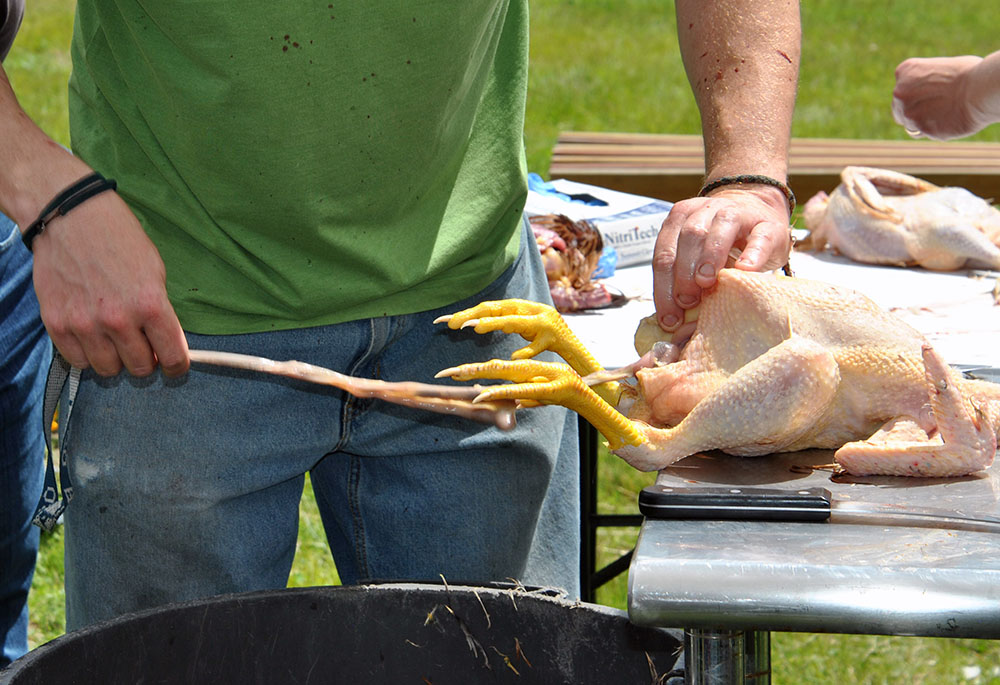
Myke Russel, co-owner of November’s Harvest Farm in Limington, removing the intestines from a chicken. | Photo by Sam Schipani
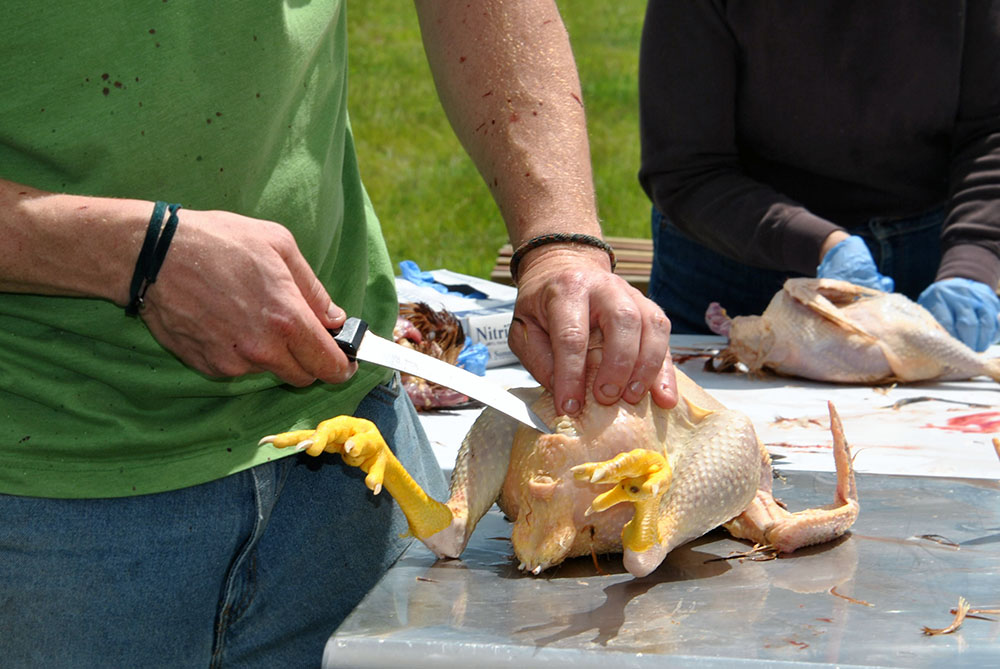
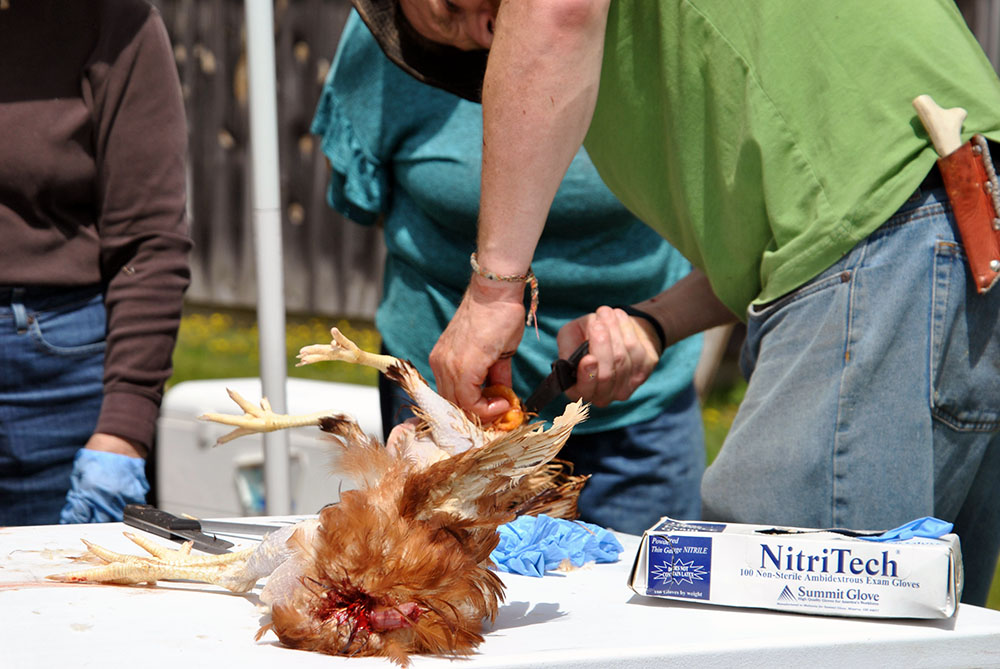
Step 7: Gut from the rear
Don your gloves and grab your knife: this is where things get clinical.
First, remove the yellow oil gland on the tail end of the chicken. The gland can compromise the taste. Cut above the gland down to the bone slide the knife along towards the tail. Make sure there is no yellow glandular tissue left on the bird.
From there, Russel said to cut through the skin upwards until you reach the natural opening to the bird’s body cavity. Slip your fingers in, stretch the skin and cut open up to the breastbone, taking care not to sever the intestine.
Insert the knife about one inch above the vent, or the “poop tube,” as Russel calls it. Carefully cut around the vent, pull it free and the intestines will follow.
“It all comes out like a package,” Russel said.
Russel said that while you are eviscerating your chicken, seeing yellow fatty tissue is fine, but you do not want to see dark green fluid. It may indicate that you have ruptured a bile duct, which will result in a foul-tasting, unsanitary bird.
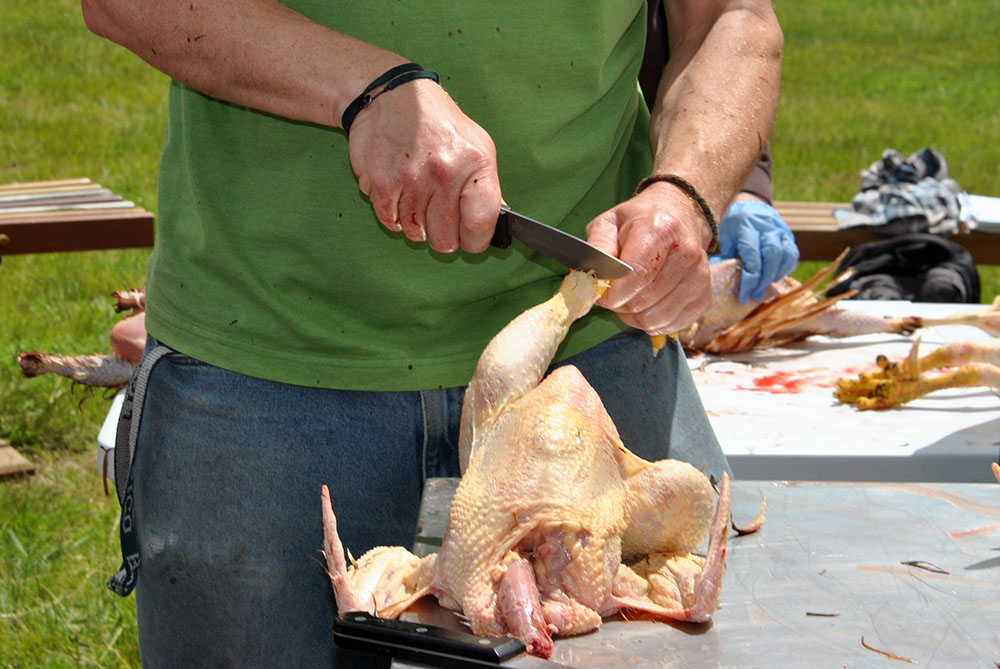
Step 8: Gut from the neck
Turn the bird around. Slit the skin along the back of the neck and slide it down to reveal the trachea and esophagus. Loosen the tubes until you reach the point where they enter the body, where you will feel the crop, where the initial stages of digestion occur. If you have allowed your chickens to fast before processing, the crop should be empty, but otherwise, it may contain partially-digested food.
Pull the crop free and leave the trachea, esophagus and crop hanging. Reach into the bird and run your hand down along the sides of the ribs. Find the hard, round gizzard and pull it out. The rest of the entrails, trachea, esophagus and crop will follow.
Then, remove the lungs by inserting your hand into the body cavity and pulling the squishy tissues from the ribs. Poultry processing suppliers sell a tool called a “lung scraper” to help with this step.
Remove the neck by cutting the muscle tissue around the bone and bending it to break the bone.
Step 9: Remove the feet
Straighten each leg and cut through the joint to remove feet. You can save the chicken feet to make stock.
Step 10: Chill and store
Now, your bird is ready for storage.
“People often pluck, eviscerate and put into the package,” Russel said. “No! You have to bring the temperature down. If you freeze it immediately, especially if you seal it, you’ll trap bacteria inside.”
Russel said to chill your chicken in a bucket of ice water for at least an hour. After chilling, pat dry and store the bird in a large, freezer-safe, sealed bag in the refrigerator. Allow the muscles to relax in the refrigerator for a few days before eating or freezing.
Homesteaders interested in backyard chicken processing may also want to take a class in food safety and chicken processing before they begin, but with these 10 simple steps and a tough stomach, you will be well on your way to bringing tasty birds from your farm to your freezer.